January 14, 2014

Catachan Jungle Warriors

posted by Androsch

Hey!

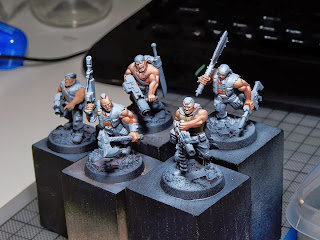
I'm working on some Catachan Imperial Soldiers at the moment. They will fight alongside the forces of the Inquisition.

I worked some hours on the skin until now. After reading MV's article about Duncan Colours, I decided to dust off my old set of them and give them a try again. I used "Rosy Tan" for the basecoat and was pretty satisfied by the results.


I'm trying to keep the colorscheme simple this time, so I can easily reproduce the colours for a bigger army.

This is what I used:

Basecoat: Rosy Tan (Duncan)
First Shadow: Rosy Tan + Dark Flesh (GW)
Second Shadow: Dark Flesh + Tiny Drop of Castellan Green (to break it down)
Outlining: Added some dark Ink
First Highlight: Rosy Tan + Pale Sand (Vallejo)
Additional Highlights: Added more Pale Sand

Kind Regards,
Androsch


January 13, 2014

Tutorial: Casting your own Resin Bases

posted by Androsch

Hi!

I got tired of building the same bases for my Black Templars over and over again, so I decided to make a mold and cast them. My first try was pretty simple, but I think it shows the process quite well.

You need:

  • Your custom made master bases 
  • 2-component silicon 
  • Good quality resin 
  • A sharp hobby knife 
  • A suitable container for pouring 
  • Mixing pots (I use plastic liqour cups - cheap and great) 
  • Some toothpicks for mixing 


1) Place the bases bottom-down in your container. Make sure it's not to big, so you don't waste too much silicon. Use a little blue-tac/pattafix or glue to fix them to the bottom. If you don't they might start swimming afterwards. ;)


2) Mix your silcion according to the products instructions (most likely 50/50). I use 2 plastic cups to fill in the components and pour them in a third one. Mix well, but not to fast to avoid air bubbles. Then pour the stuff over your bases. Pour in a corner of the container and let it flow around the bases. Don't put it directly over it, because you'd get more air bubbles.


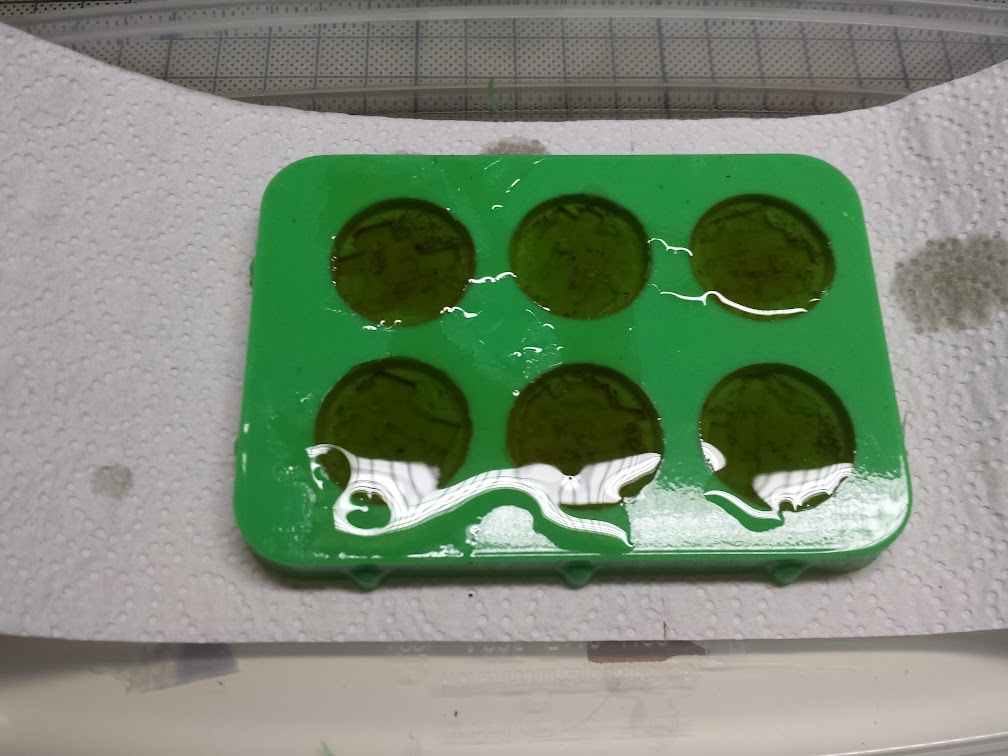
3) Make sure the mold has hardened completely.  When you take it out of the container it will look something like above.


4) Cut out the excess with a hobbyknife. Make sure you do this step as clean as possible.


5) Mix your resin according to the instructions. Mine is 50/50 again. I use 3 cups as shown above. 2 for the components and a third one for mixing. Make sure everything you need is in place before you start mixing. You only have a few minutes, depending on what product you use.


6) Gently pour the resin into the mold. I overfilled them a bit, because I thougt it might reduce a little while hardening, but it didn't. Just make sure the mold is well filled and try to eliminate any air bubbles with a toothpick. Since this is a a one part mold and the surface is pretty big, air bubbles can escape pretty good, so this shouldn't be much of an issue here.


7) After they've cured, I removed the bases from the mold.


8) I removed the flash and sanded them afterwards. Use some sandpaper to make the bottom side even because they will be a little rounded after casting.


9) The finished bases

I hope you enjoyed the article and are eager to create your own resin bases. ;)
For my next article I'll try something more complex.

Kind regards,
Androsch
January 09, 2014

Space Hulk Scriptor WIP

Something i´m painting at the moment.
It is a miniature for a tabletopwelt.de user. We made an miniature exchange and he paint´s a miniature for me.

I got a Space Hulk Scriptor to paint and i´m on the right way i think.

I hope you like it.


best regards
Darkezekiel

January 07, 2014

Henrik Lundqvist - WIP 2

Hey!

Another painting night and Henrik Lundqvist is making progress :)

I did the lettering and the shirt number on the back of the jersey. Also I started with the freehands on the catch glove and the blocker but they are not finished yet. A few other details are also in progress, but see for yourself.


January 05, 2014

Henrik Lundqvist - WIP

Hey everybody!

It has been very quiet in our blog during the last weeks. Now it is time for the Pumpkin Painters to awake from our winter sleep :) We made use of the Christmas holidays and started the new year with some new projects.
My first one for 2014 is a birthday gift for my sister. She loves hockey and likes watching NHL games and so we gave her a miniature of a hockey goalie. Since I didn't know which player she would like to have the gift was the plain figure and the paint job the way she wanted it.

Her choice was Henrik Lundqvist from the New York Rangers because of the great color scheme of the jersey and of course because of the amazing design of his helmet.

So here are the first WIP shots of Henrik Lundqvist :)


At this point the basic color of the jersey is finished and the helmet is also almost done. After I took the photos I decided to redo the stripes and the Rangers lettering.